Infrared Photography
The infrared region is a fascinating part of the electromagnetic spectrum.
In the olden days, photos were taken on silver halide emulsion film, which worked great if the subject were perfectly still. But early films suffered a serious drawback; they were primarily sensitive to blue light, faintly to green, and not at all to yellow or red. Companies started changing the formulation of the film to get it to pick up a wider range of wavelengths. Once film could "see" the entire visible spectrum, color photography became practical, using grains of starch dyed red, green, and blue, and then pressed against the film medium in manufacturing. For a while, there was even CIR or color infrared film available, such as Kodak's Ektachrome which could take some pretty surreal photos.
Digital cameras brought a completely new way of doing things. Now the image would be focused onto a wafer of silicon instead of a silver halide emulsion. Silicon has a different spectral response; it actually "likes" reds and yellows considerably more than blues or greens. And it really likes infrared. Human vision is sensitive to light wavelengths in the 0.4μ to 0.7μ (micron) range, while silicon is good to about 1.1μ. However, if one's goal is to reproduce color exactly, or as close to exact as possible, that infrared can become a problem. So camera companies add an IR-block filter, often a hot mirror (reflects IR like a mirror, transmits visible light like regular glass), so no pesky infrared - or very little - gets onto the image sensor. So every digital camera is an infrared camera with the infrared feature blocked. Sigh.
Fortunately, there's an answer that doesn't involve ungluing a tiny, delicate filter from a tiny delicate image sensor. Though some people do that too and it works often enough. But for a lazy-bones with below average motor coordination like me, a ready-made IR camera is a much better choice. Closed circuit surveillance cameras are typically unfiltered, so that a store or factory can use IR illumination at night and catch bad actors even in what humans think is pitch blackness, and for a while I was playing with a black and white surveillance camera, hooked up to my WinTV board, and took some not too high quality IR and multiband photos that way. I had to do all my own color filtering, so the subject again had to remain still while I fumbled with red, green, and blue filters held in place by a propped up hot mirror and tried not to nudge the camera. My catchphrase quickly became "Shoot! Reshoot." when the slightest movement meant the process had to be started over fresh. And the setup wasn't at all portable.
But now that it's the 21st century, we can use the special "NoIR" camera offered by Raspberry Pi that works with their computer boards. It's manufactured without the hot mirror (it has no IR filter, hence the name NoIR), so it can see clearly in near infrared. Its spectral response looks like this:
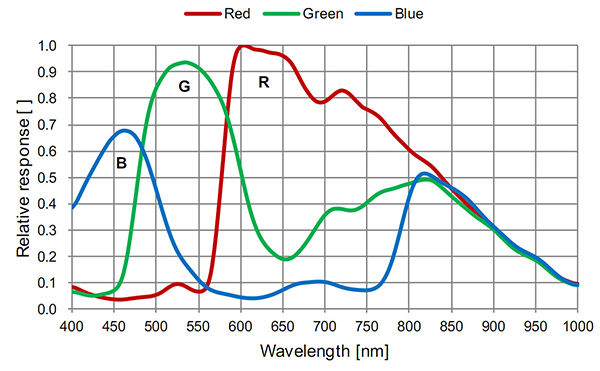
Note: 1000nm = 1μ.
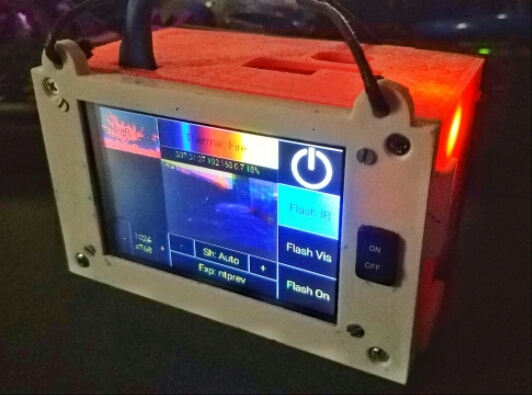
A Raspberry Pi board with a battery and a NoIR camera makes for a very portable handheld setup. A touch screen can be added for viewing and controls on the go. The challenge of getting a case for it is easy to solve by designing and making a 3D printed case like this one:
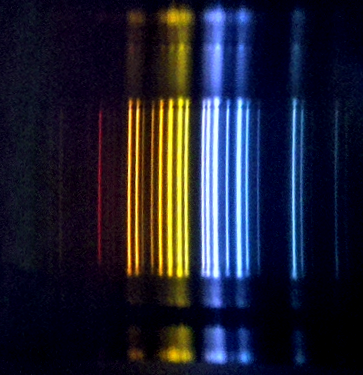
But remember the spectral response of the camera. Its image sensor, like that of any other color digital camera, has millions of tiny filters to separate out red, green, and blue, and we see from the graph that they do this reasonably well. But all three let in infrared, especially past about 0.8μ, so wouldn't that cause infrared to show up as gray or white? Well, it can, like this image of the spectrum of argon gas where far-red looks yellowish and infrared looks pale ghostly grayish blue:
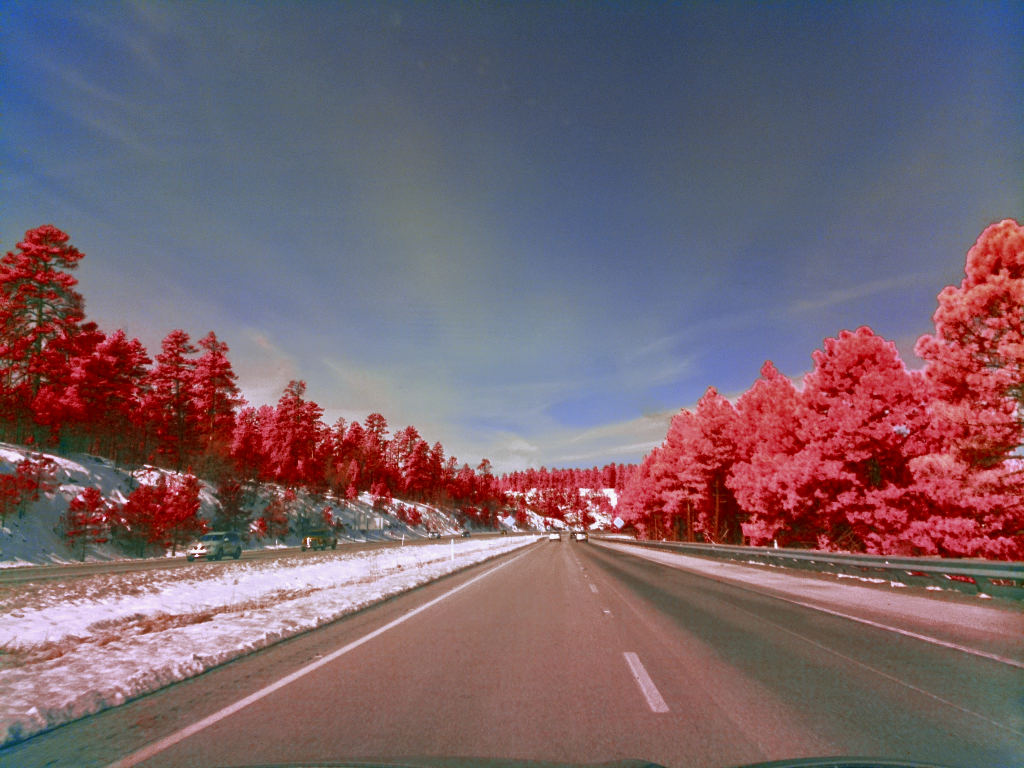
But we can use the camera's own auto white balance to help out the task. Placing an amber filter in front of the camera, one that's strong enough to completely block all blue light, makes it possible to limit the blue channel to only picking up infrared wavelengths. Essentially we've turned it from a blue channel to an infrared channel; the image is no longer RGB but RGI. Since infrared makes up relatively less of the response of the red and green channels, the camera's internal software will adjust levels and the result is a nice blue wherever an object reflects only or mostly infrared light:
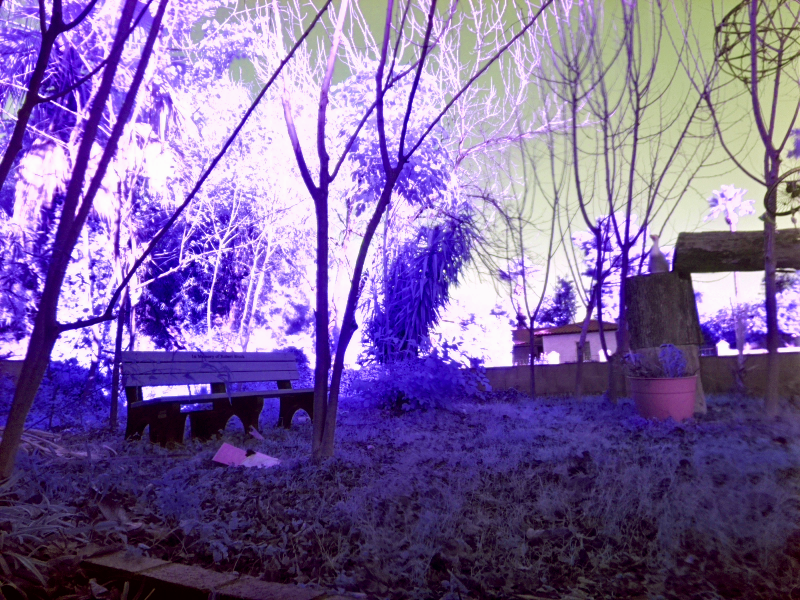
Leaves are very very infrared.
I have to say I'm not a fan of the pukey green sky though. Of my friends that I asked, only one preferred these colors to CIR colors, so some channel remapping is definitely in order, with the option to take RGI photos if desired. So we'll map the camera's infrablue channel to red, and we'll shift the camera's red and green channels to green and blue, respectively. And presto! CIR photos.
Thermal Infrared
There's a lot to see in the wavelength region between 0.8μ and 1.1μ, but one thing the image sensor can't see is heat, at least not near room temperature. All objects emit light at all times, and the range of wavelengths depends on its temperature; this is called blackbody radiation because if a perfectly black object, that reflects no light, were measured with a spectroscope, only the light it emits would show up. For most objects around us, the peak wavelength of their blackbody radiation is around 10μ, and the shortest wavelengths they emit is near 3μ, still well outside the range of the camera. (You can look at calculated blackbody curves for any temperature here, just make sure to set the lower limit to 1 μm or less for comparison with the CIR region.) There are fancy image sensors using weird compounds of lead or barium or tellurium (oooo poisonous!) that can image the entire 1-10 μ range and beyond, but they require a cooling system so they're expensive and not very practical for a handheld camera.
Panasonic makes a nice little thermal unit that does not require cooling, that instead of detecting the ~10μ light directly, uses an array of thermistors, or resistors that change their value according to their temperature. The electronics inside the chip are sensitive enough that when light in the thermal infrared range falls on the thermistors, it subtly heats them, causing a change that can be measured. This unit only offers 8x8 resolution, but another manufacturer makes a 32x24 sensor, which is still really low resolution but offers a clear enough image that when I stood in front of one set up for realtime display on a computer, my roommate could identify me by the image on the screen!
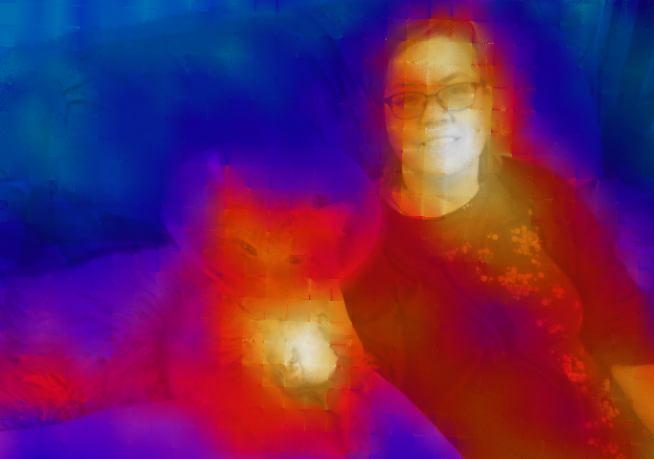
A human petting a cat. You can literally see the warmth.

Cinderblocks get hot in the sun, even in winter.
One of my favorite tricks is to combine the CIR and thermal images in such a way that visible light shows up as blue, near infrared as green, and thermal as red. I call this TIV mode which stands for thermal-infrared-visible:

It even makes the trees green!